
Two completely different categories of software are needed to go from idea to finished print: something to design the 3D model, and something to convert that model into instructions the printer can follow. Both have excellent free options in 2026, but figuring out which tool fits which job – and which specific tool to start with – can be confusing. Here’s a breakdown of the landscape.
Modeling Software vs. Slicer Software: The Key Distinction
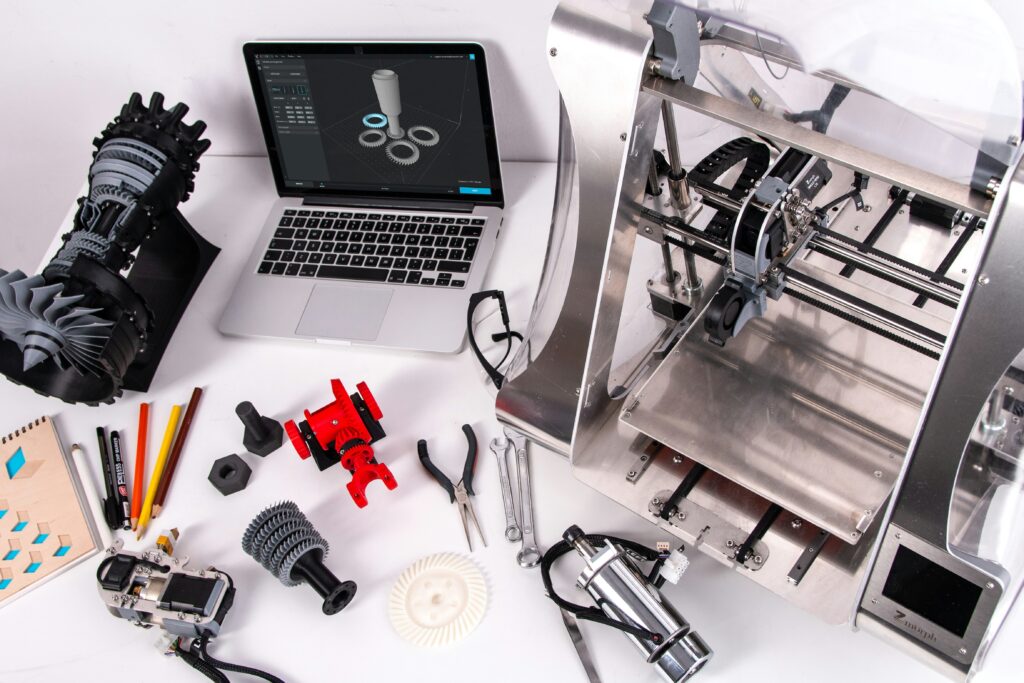
These are separate tools that work together, not alternatives to each other. 3D modeling (or CAD) software is where a design gets created – drawing, combining, and shaping geometry into the object that will eventually be printed. Slicer software takes that finished design (typically an STL, OBJ, or 3MF file) and converts it into G-code: the layer-by-layer instructions a specific printer actually follows, including settings like layer height, supports, infill, and temperatures.
A common point of confusion: searches for a “browser-based 3D printing slicer” often don’t distinguish between modeling and slicing software. Tinkercad – a modeling tool – genuinely runs in a browser with no download required. The leading slicers (Cura, PrusaSlicer, Bambu Studio, OrcaSlicer) are desktop applications, not browser-based, even though they’re all free. If the goal is doing everything in a browser, that’s realistic for modeling but not for slicing with any of the major, widely-recommended slicer options.
3D Modeling Software: Where to Start
Tinkercad: The Universal Starting Point
For anyone brand new to 3D design, Tinkercad is the near-universal recommendation – and for good reason. It’s completely free, runs in any browser with no installation, and uses a drag-and-drop interface where designs are built by combining and subtracting basic shapes. It has the lowest learning curve of any tool on this list and exports directly to STL and OBJ, meaning every major slicer opens Tinkercad files without any conversion. Tinkercad also offers a large public gallery of community designs, many with build-along guides, making it a genuinely useful learning resource beyond just the modeling tool itself.
Tinkercad is also commonly cited as excellent for teaching – its simplicity makes it a popular choice for introducing kids to 3D design specifically.
FreeCAD: Free Parametric CAD
Once a design needs to do something functional – fit into an enclosure, interface with another part, or replace a specific broken component – parametric CAD becomes important. Parametric modeling means dimensions and relationships between features are defined precisely and can be adjusted later (change one measurement and connected features update automatically), which is essential for functional parts like brackets, mounts, and enclosures. FreeCAD is a free, open-source option that provides this professional-grade parametric modeling at zero cost, making it the natural next step after Tinkercad for anyone who needs more precision.
Fusion 360: Professional-Grade, Free for Personal Use
Fusion 360 (free for personal/hobbyist use) is widely considered the most capable free parametric CAD option, with simulation tools and broad capability beyond what FreeCAD offers – at the cost of a steeper learning curve. It requires periodic internet check-ins for license verification but otherwise works offline. For anyone planning to eventually do more advanced engineering-style design work, starting with Fusion 360’s free tier rather than switching later can save a relearning step.
Blender: Sculpting and Organic Shapes
Blender takes a fundamentally different approach – mesh-based sculpting rather than parametric modeling – making it the tool of choice for organic, artistic shapes (figurines, characters, detailed sculptural work) rather than precise engineering parts. It’s free, immensely capable, and has a correspondingly steep learning curve. For tabletop miniatures or detailed artistic models, a common workflow combines Blender for sculpting with a repair tool (covered below) before slicing.
Meshmixer: Repair and Editing
Meshmixer specializes in repairing and editing existing 3D models – fixing “non-watertight” geometry (gaps or errors in a mesh that can cause slicing problems), hollowing models to save material, and adding supports manually for tricky overhangs. It’s a common step between sculpting in Blender and slicing, particularly for downloaded or scanned models that may have geometry issues.
Slicer Software: Converting Designs to G-Code
The leading free slicers in 2026 – OrcaSlicer, Bambu Studio, PrusaSlicer, and Ultimaker Cura – cover the vast majority of FDM printers between them, and one of them suits almost every machine. Paid slicers exist but are rarely necessary for hobbyist or even most professional use.
| Slicer | Known For |
| Ultimaker Cura | Universal compatibility, massive printer profile library, the most popular free slicer overall |
| PrusaSlicer | Beginner-friendly with strong printer-specific presets; basis for several other slicers |
| Bambu Studio / OrcaSlicer | Forks of PrusaSlicer favored for high-speed printing and strong automatic supports |
| Chitubox | The standard choice specifically for resin printers, separate from the FDM slicers above |
For resin printing specifically, none of the FDM-focused slicers above apply – Chitubox (or a printer manufacturer’s own resin slicer) is the standard tool for that workflow instead.
File Formats: STL, OBJ, and 3MF
STL remains the most universal format for 3D printing – every modeling tool exports it, and every slicer imports it. OBJ is similarly widely supported. 3MF is a newer format that’s become preferred by some slicers (notably Bambu Studio) because it preserves more metadata – things like multi-part assemblies, color assignments, and print settings – that STL doesn’t carry. Tools like Fusion 360 and Shapr3D can export 3MF directly; for tools that only export STL, that’s still fully compatible with any major slicer, just without 3MF’s extra metadata.
A Practical Starting Workflow
- Absolute beginner, want to see something printed quickly: Tinkercad for modeling, paired with Cura or whichever slicer matches your printer brand
- Need functional parts (brackets, mounts, replacement hardware): Move to FreeCAD or Fusion 360 for parametric modeling once Tinkercad’s simplicity becomes limiting
- Artistic or sculptural projects (miniatures, figurines): Blender for sculpting, Meshmixer for cleanup/repair, then your slicer of choice
- Already own a Bambu Lab printer: Bambu Studio handles slicing and includes basic editing tools (scaling, splitting, mirroring) directly, plus access to MakerWorld’s community model library
AI-Assisted Modeling: What’s New in 2026
AI-powered tools that generate 3D models from text descriptions or photos have become more capable through 2026, offering a way to go from an idea (or even a photo of an object) to a printable model without traditional modeling skills. These tools work best as a starting point – generated models often benefit from cleanup in a repair tool before slicing, similar to downloaded or scanned models – rather than as a complete replacement for traditional modeling software, particularly for anything that needs to be dimensionally precise or functional.
CAD Design Principles for 3D Printing
Whichever modeling tool gets used, designing specifically for 3D printing – rather than just 3D modeling in general – involves a few considerations that don’t matter for purely digital models but matter enormously once a design needs to come off a print bed successfully.
Wall Thickness and Minimum Features
Every printer has a minimum nozzle size (commonly 0.4mm), which sets a practical floor for how thin walls or fine details can be and still print reliably. Designs with walls thinner than roughly 2-3 times the nozzle diameter often print poorly or fail entirely – a detail that’s invisible in modeling software but becomes obvious the moment a print comes off the bed as a blob instead of a feature.
Overhangs and Supports
Any part of a model that extends outward without anything beneath it needs either a steep-enough angle to print without support (commonly anything up to about 45 degrees from vertical is considered safe without supports, though this varies by printer and settings) or support material that gets removed afterward. Designing with this in mind – orienting a model so fewer surfaces need support, or splitting a model into pieces that each print without major overhangs – reduces both print time and the post-processing work of removing support material.
Watertight Geometry
A “watertight” or “manifold” mesh is one without gaps, holes, or self-intersecting surfaces in its geometry – effectively, a shape that could theoretically hold water without leaking. Slicers generally need watertight geometry to generate correct G-code; models with geometry errors can slice into prints with missing walls, holes, or other defects that weren’t visible in the modeling software’s preview. This is exactly the kind of issue that repair tools like Meshmixer or Microsoft 3D Builder are designed to catch and fix before slicing.
Designing for Assembly
For models that will be printed in multiple parts and joined afterward (common for anything larger than a printer’s build volume), designing in features like alignment pins, tabs, or slots makes assembly significantly easier and more accurate than relying on butt joints and glue alone. Thinking about how pieces will actually go together – and in what order – during the design phase, rather than after printing, avoids discovering an assembly problem only after all the pieces are already printed.
Free vs. Paid: Is Paid Software Ever Worth It?
For the overwhelming majority of hobbyist and even small-business use cases, the free tools covered above are genuinely sufficient – this isn’t a case of free tools being a watered-down trial version of something better. Fusion 360’s free tier, FreeCAD, Blender, and the major slicers are full-featured, actively maintained, and used by professionals as well as hobbyists.
Paid CAD and slicer software tends to make sense in narrower scenarios: commercial use that exceeds free-tier licensing terms (Fusion 360’s free tier, for instance, is specifically for personal/hobbyist use), specialized industry-specific features (certain simulation or manufacturing-integration tools), or enterprise support and collaboration features relevant to larger teams. For an individual maker – even one running a small Etsy shop or side business – it’s worth exhausting what the free tools can do before assuming a paid upgrade is necessary, since the gap that paid software actually closes is often narrower than it might first appear from product marketing alone.
Learning Resources
Beyond the software itself, the learning curve for any of these tools is significantly eased by the size of their user communities. Tinkercad’s gallery, Bambu Studio’s MakerWorld, and similar platforms aren’t just model repositories – they’re also informal learning resources, since many shared designs include notes on how they were modeled or sliced. For slicers specifically, most beginner difficulties (failed prints, poor surface quality, support issues) trace back to settings that have well-documented community solutions, making forums and community wikis for a specific slicer a practical first stop when something doesn’t print as expected.
Frequently Asked Questions
What’s the difference between 3D modeling software and a slicer?
Modeling software (like Tinkercad, FreeCAD, or Blender) is used to design or create a 3D model. A slicer (like Cura or PrusaSlicer) converts that finished model into the layer-by-layer instructions (G-code) a specific printer follows. They’re separate tools used together, not alternatives.
Is there a good browser-based slicer for 3D printing?
The leading slicers (Cura, PrusaSlicer, Bambu Studio, OrcaSlicer) are desktop applications, not browser-based, though all are free. Tinkercad, a modeling tool, is genuinely browser-based – but it doesn’t replace the slicing step.
What’s the best free 3D modeling software for beginners?
Tinkercad is the near-universal starting recommendation – free, browser-based, drag-and-drop, and exports directly to formats every slicer accepts. It’s also widely used for teaching kids 3D design.
Do I need CAD software, or is Tinkercad enough?
For simple objects, gifts, and most beginner projects, Tinkercad is enough. For functional parts that need to fit precisely with other objects or replace specific hardware, parametric CAD software like FreeCAD or Fusion 360 (both free) offers the precision and adjustability Tinkercad’s simpler tools don’t provide.
Which slicer should I use for my 3D printer?
Ultimaker Cura offers the broadest printer compatibility and is the most popular overall. If your printer is from Bambu Lab, Bambu Studio is the natural choice. PrusaSlicer and its forks (OrcaSlicer, Bambu Studio) are favored for strong presets and automatic supports. For resin printers, Chitubox is the standard rather than any of these FDM-focused slicers.
Final Thoughts
The free software landscape for 3D printing in 2026 is genuinely capable enough that cost isn’t really a barrier at any stage – from Tinkercad’s drag-and-drop simplicity through to Fusion 360’s professional-grade parametric modeling, and from Cura’s universal slicer compatibility to Bambu Studio’s tight integration for Bambu printers specifically. The real decision isn’t which paid tool to buy, but which free tool matches the kind of designing being done – simple shapes, precise functional parts, or organic sculptural work – and starting with the simplest tool that fits rather than the most powerful one available.